


How to Install Waterproof Flooring in Your Bathroom
Discover how to install waterproof flooring in your bathroom with this step-by-step guide. Learn tips, tools, and why Cyndi’s Floors N More is your go-to for expert advice and quality products
When it comes to bathroom renovations, flooring is one of the most important upgrades you can make. Not only does your bathroom floor need to look beautiful and complement your dcor, but it also has to withstand moisture, humidity, and splashes on a daily basis. Thats why waterproof flooring has become such a popular choice among homeowners.
Whether you're doing a full remodel or simply upgrading the floor, installing waterproof flooring in your bathroom can enhance durability, safety, and styleall at once. In this step-by-step guide, well walk you through everything you need to know to install waterproof flooring with confidence. Well also explore why working with trusted flooring experts like Cyndis Floors N More can make all the difference.
Why Waterproof Flooring Matters in Bathrooms
Bathrooms are high-moisture environments. From steamy showers to unexpected leaks, water can easily penetrate porous flooring, leading to mold, mildew, and damage over time. That's why waterproof flooring is a smart investment.
Benefits of waterproof flooring include:
-
Water resistance: Protects the subfloor and walls from moisture damage.
-
Durability: Stands up to heavy foot traffic and frequent cleaning.
-
Easy maintenance: Spills and splashes are easy to wipe up.
-
Long-term savings: Avoid costly water damage repairs down the line.
Now that we understand the importance, lets look at how you can install it yourself.
Best Waterproof Flooring Options for Bathrooms
Before diving into installation, its important to choose the right type of flooring. Some of the best waterproof options include:
1. Luxury Vinyl Plank (LVP) or Tile (LVT)
-
Looks like real wood or stone
-
Waterproof and scratch-resistant
-
DIY-friendly with click-lock installation
2. Porcelain or Ceramic Tile
-
100% waterproof
-
Very durable and long-lasting
-
Can be more challenging to install
3. Waterproof Laminate Flooring
-
Improved technology makes it water-resistant
-
Easy to install and clean
-
Must be properly sealed to prevent water intrusion
4. Sheet Vinyl
-
Seamless and completely waterproof
-
Affordable and easy to clean
-
Requires careful cutting and fitting
For many homeowners, Luxury Vinyl Plank is the top choice because it offers the beauty of wood with the practicality of waterproof vinyl.
Tools and Materials Youll Need
Heres what youll need to get started with installing waterproof vinyl flooring (LVP or LVT):
Tools:
-
Tape measure
-
Utility knife
-
Spacers
-
Rubber mallet
-
Pull bar
-
Tapping block
-
T-square or straight edge
-
Pencil or chalk
-
Safety gear (gloves, kneepads)
Materials:
-
Waterproof flooring planks or tiles
-
Underlayment (if required)
-
Transition strips
-
Silicone caulk or waterproof sealant
-
Moisture barrier (if not already integrated)
Pro tip from the team at Cyndis Floors N More: Always check with the manufacturers instructions regarding underlayment and moisture barriers.
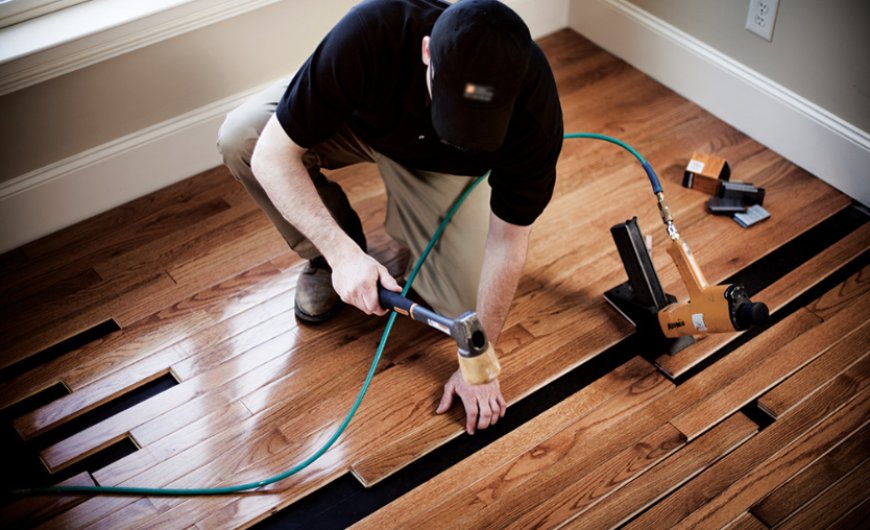
Step-by-Step Guide to Installing Waterproof Flooring
Lets break the process down into simple steps:
Step 1: Prep Your Bathroom
Start by removing the old flooring. If you're removing tile, you'll need a chisel and hammer. Once the floor is bare:
-
Remove baseboards and molding.
-
Ensure the subfloor is clean, dry, and level.
-
Repair any dips or high spots.
-
Use a moisture meter to ensure the subfloor is dry.
If you're installing over concrete, a vapor barrier may be necessary. Cyndis Floors N More can assist you with professional prep if needed.
Step 2: Acclimate Your Flooring
Before installation, let your vinyl flooring sit in the bathroom for 24-48 hours. This helps the material adjust to the rooms temperature and humidity, reducing the risk of expansion or contraction later on.
Step 3: Plan Your Layout
-
Measure the room and plan your plank layout.
-
Avoid having very narrow planks along the walls.
-
Use a chalk line to ensure your first row is straight.
Take into account any areas around the toilet, vanity, and tub. You may need to make detailed cuts with a jigsaw or utility knife.
Step 4: Install the First Row
-
Start in a corner with the groove side facing the wall.
-
Place spacers between the plank and wall for expansion (usually 1/4).
-
Connect planks end to end, using a tapping block to secure a tight fit.
Be sure to stagger the joints in each row for a more natural look and improved stability.
Step 5: Continue Across the Room
-
Use the leftover piece from the previous row to start the next row.
-
Snap the long edges together and tap lightly into place.
-
Use the pull bar for tight spaces near the wall.
Make any necessary cuts as you approach obstacles like toilets or cabinetry. Always leave an expansion gap.
Step 6: Cut Around Fixtures
Bathrooms often have odd shapes and fixtures, which can make cutting tricky.
-
Use a paper template to trace around toilets or sink pedestals.
-
Transfer the shape to your plank and cut with a utility knife or jigsaw.
-
Dry fit before locking it into place.
Apply silicone sealant around all edges where water could potentially seep throughespecially around toilets, tubs, and sinks.
Step 7: Add Finishing Touches
-
Reinstall the baseboards and trim, leaving space for flooring expansion.
-
Add transition strips where the flooring meets another surface.
-
Apply caulk along walls and fixtures for a waterproof seal.
And just like thatyour new bathroom floor is ready to enjoy!
Tips for a Flawless Installation
Here are a few pro tips to help your project go smoothly:
-
Double-check measurements before cutting.
-
Use a sharp blade to get clean cuts on vinyl.
-
Work slowly around tricky areas like toilets or door jambs.
-
Label planks if you're cutting them ahead of time to avoid confusion.
-
Keep the floor clean during installation to prevent debris from interfering with the locking mechanism.
And rememberif you need expert help or materials, Cyndis Floors N More offers a full range of waterproof flooring options and professional advice tailored to your bathroom renovation.
Why Choose Cyndis Floors N More?
At Cyndis Floors N More, we understand that every bathroom is different. Thats why we offer personalized service to help you find the best waterproof flooring for your home. Whether youre doing it yourself or want expert installation, weve got you covered.
Here's what sets us apart:
-
High-quality flooring brands
-
Expert product knowledge
-
Professional installation available
-
Friendly, local service you can trust
Visit our showroom or call today to speak with a flooring expert who can guide you through the selection and installation process.
Maintenance Tips for Waterproof Flooring
Once installed, your waterproof flooring will require minimal maintenance:
-
Sweep or vacuum regularly to remove dust and dirt.
-
Wipe up spills immediately to keep the floor looking new.
-
Use gentle, non-abrasive cleaners recommended by the manufacturer.
-
Avoid dragging heavy furniture across the flooruse protective pads.
With proper care, your waterproof flooring can last for decades and maintain its beautiful appearance.
Final Thoughts
Installing waterproof flooring in your bathroom is one of the best upgrades you can make for both functionality and style. With the right materials, tools, and guidance, even DIYers can achieve a professional look.
If you're unsure about product selection, subfloor prep, or installation techniques, dont hesitate to reach out to the pros at Cyndis Floors N More. From luxury vinyl to tile and laminate, we offer the perfect waterproof solution for your space.
FAQs
1. Can I install waterproof flooring over existing tile in my bathroom?
Yes, in many cases you can install waterproof vinyl plank or laminate over tileif the existing floor is level, clean, and in good condition. You may need an underlayment or leveling compound.
2. Is waterproof vinyl flooring safe to use around a toilet and tub?
Absolutely. Just be sure to seal the edges with silicone caulk to prevent water from seeping underneath. This helps maintain a watertight barrier and prevents mold growth.
3. How long does it take to install waterproof flooring in a small bathroom?
For a small bathroom (5x8), installation can typically be completed in 46 hours, depending on your skill level and the complexity of the room.